
There’s clean, and then there’s kitchen clean.
You can wipe the counters, wash the dishes, and sweep the floor, yet somehow the kitchen still feels a little grimy. Usually, grease is the reason.
Cooking grease has a habit of traveling. It starts around the stove, but eventually you notice it on the backsplash, cabinet handles, range hood, knobs, and even appliances sitting nearby. Leave it for long enough and ordinary dust sticks to it, creating that stubborn film that doesn’t disappear with one quick wipe.
The good news is that most everyday kitchen grease doesn’t require an entire cupboard of cleaning products. A few simple methods—and a little patience—can make a huge difference.
Here are 15 easy tricks for tackling stubborn kitchen grease without turning your Saturday into an all-day cleaning marathon.
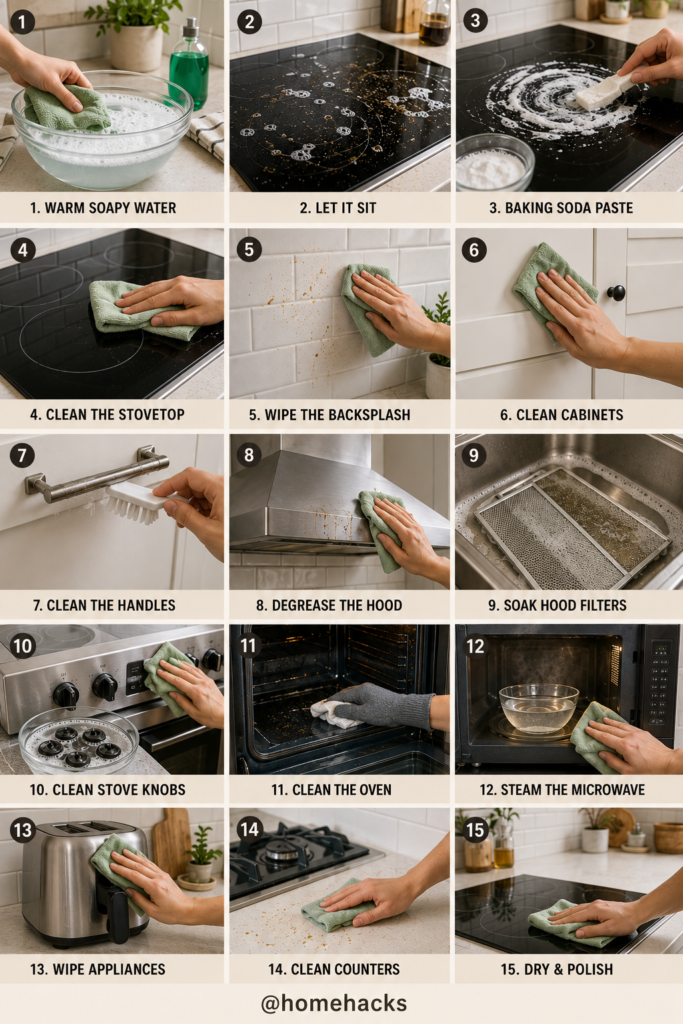
1. Start With Warm Soapy Water
Before reaching for anything stronger, start simple.
Fill a bowl or sink with warm water and add a small amount of grease-cutting dish soap. Dip a microfiber cloth into the water and wring it out well.
Use it to wipe greasy areas around the stove, backsplash, and other washable surfaces.
Dish soap is designed to deal with grease, so for fresh cooking residue, this may be all you need.
The mistake I used to make was assuming that stubborn-looking grease automatically required a powerful cleaner. Quite often, warm water, dish soap, and a microfiber cloth do most of the job.
Always check the care instructions for the particular surface you’re cleaning.
2. Let the Grease Soften
This is probably the easiest trick on the entire list: stop scrubbing immediately.
When grease has dried onto a surface, give your cleaning solution a little time to work.
Apply an appropriate cleaner or warm soapy water, allow it to sit briefly according to the product and surface instructions, then wipe.
You’ll often find the grease comes away much more easily.
It’s the same idea as soaking a dirty pan instead of attacking it with a sponge for twenty minutes.
A little patience can save a lot of scrubbing.
3. Try a Baking Soda Paste on Suitable Surfaces
For some stubborn spots, baking soda can be useful.
Mix a small amount of baking soda with enough water to create a soft paste. Apply it to a compatible surface, allow it to sit briefly, and gently work the area with a soft cloth or non-scratch sponge.
Then rinse or wipe away the residue.
The important word here is gently.
Baking soda is mildly abrasive, so don’t assume it’s appropriate for every finish. Delicate stone, glossy surfaces, specialty coatings, and some appliance finishes may require different care.
When in doubt, check the manufacturer’s instructions and test an inconspicuous area first.
4. Give the Stovetop a Proper Clean
The stovetop is where grease tends to build up fastest.
First, make sure the cooking surface is completely cool.
Remove loose crumbs and food debris, then clean the surface using a method recommended for your particular stovetop.
Gas, electric coil, glass-ceramic, and induction cooktops aren’t all cleaned the same way.
Pay particular attention to the edges and areas around burners, where tiny cooking splatters tend to accumulate.
And don’t forget the narrow strip between the stovetop and countertop. Somehow, that’s where half of dinner seems to end up.
5. Don’t Ignore the Backsplash
A backsplash can look perfectly clean from across the room while secretly being covered in tiny grease droplets.
Look at it from an angle in daylight and you’ll probably see what I mean.
For washable tile, warm soapy water and a microfiber cloth can often remove ordinary cooking grease.
Work in manageable sections and finish by wiping away cleaner residue.
If your backsplash is made from natural stone, specialty tile, painted material, or another sensitive surface, use products appropriate for that material.
Once the backsplash is clean, the entire cooking area tends to look noticeably brighter.
6. Clean Greasy Cabinet Doors Gently
Kitchen cabinets near the stove often develop a sticky film surprisingly quickly.
The areas around handles are usually the worst.
Start with the gentlest cleaning method recommended for your cabinet finish. A soft, slightly damp microfiber cloth with a mild appropriate cleaning solution may be enough for everyday grease.
Avoid soaking cabinet doors or allowing water to sit around seams and edges.
Painted wood, laminate, thermofoil, and natural wood can all have different cleaning requirements, so aggressive scrubbing isn’t worth the risk.
A clean cabinet shouldn’t come at the expense of removing its finish.
7. Pay Attention to Handles and Pulls
Handles are touched constantly, usually while we’re cooking.
That means they’re collecting a mixture of fingerprints, oils, flour, cooking residue, and whatever else was on our hands.
Wipe handles regularly with an appropriate cleaner and soft cloth.
For compatible removable hardware, deeper cleaning may be possible, but check the material and finish first. Brass, painted hardware, coated metals, and other finishes can react differently to cleaners.
A small soft brush can help around detailed areas where a cloth can’t easily reach.
This is one of those five-minute jobs that makes the kitchen feel much cleaner.
8. Degrease the Range Hood
The range hood works hard every time you cook, which means it deserves more attention than it usually gets.
You’ll often find greasy residue on the underside, around buttons, and across the exterior.
Make sure the appliance is off and cool before cleaning.
Use a product suitable for the hood’s finish. If it’s stainless steel, follow the manufacturer’s care instructions and wipe carefully to avoid unnecessary streaks or scratches.
Don’t spray cleaner directly into controls, vents, lights, or electrical components.
Once the hood is clean, the difference can be surprisingly dramatic.
9. Clean the Range-Hood Filters
This is one of those jobs that’s easy to forget because the filters aren’t always visible.
But if you cook regularly, grease gradually collects there.
Check your range hood’s manual before removing or cleaning filters. Some metal filters are washable, while other types—particularly certain charcoal filters—may need replacement rather than washing.
For washable metal filters, follow the manufacturer’s recommended cleaning method.
And if you haven’t looked at yours for a very long time, prepare yourself.
It may explain where some of that mysterious kitchen smell has been coming from.
10. Clean Around the Stove Knobs
Stove knobs and the areas immediately surrounding them are grease magnets.
Before removing anything, check whether your appliance’s knobs are designed to come off for cleaning.
If they are removable, follow the manufacturer’s instructions. Wash or wipe them appropriately, dry them completely, and reinstall them correctly.
Clean the control panel carefully without flooding openings with water or cleaner.
Small areas like this don’t seem important until they’re clean—and then suddenly the entire stove looks newer.
11. Tackle Oven Grease Before It Gets Worse
Oven grease becomes much harder to deal with once it has been baked onto the interior repeatedly.
Clean spills once the oven is completely cool and it’s safe to do so.
For deeper cleaning, follow your oven manufacturer’s instructions. Different ovens have different interior coatings, self-cleaning functions, and restrictions on which products can be used.
Avoid randomly combining cleaners in an attempt to make them stronger.
More chemicals don’t automatically mean better cleaning.
Regularly dealing with small spills is much easier than waiting until the oven looks like an archaeological site.
12. Use Steam to Loosen Microwave Grime
Microwaves are one of my favorite appliances to clean because steam can make the job so much easier.
Place water in a microwave-safe bowl and heat it carefully until steam forms, following safe microwave practices.
After heating, allow the bowl and interior to cool enough to handle safely.
The moisture can help soften dried food splatters, making them easier to wipe away with a cloth.
Remove the turntable if appropriate and wash it separately.
Then wipe the ceiling, sides, door, and the area underneath the turntable.
It usually takes far less effort than scrubbing dried splatters directly.
13. Wipe Down Small Appliances
Take a look at the appliances sitting near your stove.
Your toaster, coffee maker, kettle, blender, or air fryer may have a thin layer of cooking grease even if they don’t look obviously dirty.
Unplug appliances before cleaning when appropriate and follow their individual care instructions.
Usually, the exterior only needs careful wiping with a slightly damp cloth and then drying.
Never immerse electrical appliances or allow liquid into vents, controls, plugs, or other electrical areas.
Cleaning these items makes a surprisingly big visual difference because they’re often sitting right at eye level.
14. Remove Grease From Countertops
Grease doesn’t politely stop at the edge of the stove.
It lands on surrounding countertops too.
The correct cleaning method depends heavily on what your counters are made from.
Quartz, laminate, granite, marble, butcher block, stainless steel, and other surfaces can have very different care requirements.
Use a cleaner appropriate for your countertop and pay particular attention to the area immediately beside the stove.
Don’t forget corners, edges, and the space behind countertop appliances.
Those hidden areas can become sticky long before the visible countertop does.
15. Finish by Drying and Polishing
This final step sounds unnecessary until you try it.
After cleaning, use a clean, dry microfiber cloth to remove remaining moisture and residue from surfaces where appropriate.
It helps reduce streaks and leaves everything looking finished rather than merely wet.
You don’t need artificial shine or mountains of polish.
A genuinely clean, dry stovetop and countertop usually look better than surfaces covered in product residue.
Then wash your microfiber cloths so they’re ready for next time.
The Best Way to Keep Kitchen Grease From Building Up
The easiest grease to clean is the grease that hasn’t been sitting there for three months.
After cooking something particularly oily, spend a few minutes wiping the cooking area once everything has cooled safely.
Check the stovetop.
Wipe obvious backsplash splatters.
Clean the countertop beside the stove.
Give nearby handles a quick wipe if necessary.
That tiny routine prevents thin layers of grease from gradually becoming thick, sticky grime.
I find this much easier than saving everything for one enormous deep-cleaning day.
Don’t Mix Cleaning Products
This deserves its own section because cleaning hacks online sometimes encourage combinations that shouldn’t be used together.
Never casually mix household cleaning chemicals.
In particular, bleach should not be mixed with ammonia, vinegar or other acids, or other cleaners unless a product’s manufacturer explicitly directs a safe use.
If you switch cleaning products, rinse the surface appropriately and follow label directions.
Good ventilation, gloves when recommended, and reading the product label aren’t glamorous cleaning hacks—but they’re much more important than getting a shiny stovetop five minutes faster.
Work From the Top Down
If you’re deep-cleaning the whole kitchen, start higher up.
Clean the range hood first, then the backsplash and upper cabinets. Move down toward the stovetop and countertops afterward.
Otherwise, you’ll beautifully clean your stove and then drop dirty water and greasy debris onto it while cleaning the hood.
I’ve learned that lesson the annoying way.
Finish with the floor so anything that fell during cleaning gets picked up at the end.
You Probably Don’t Need 15 Different Cleaning Products
Despite having 15 tricks on this list, you don’t need 15 bottles under your sink.
For many kitchens, a few basics can handle a large portion of routine grease cleaning:
Warm water.
Dish soap.
Microfiber cloths.
A soft cleaning brush.
Baking soda for compatible surfaces.
And, when necessary, a specialized cleaner recommended for the particular appliance or material.
Using the correct product for the surface matters much more than having the strongest cleaner available.
Final Thoughts
Stubborn kitchen grease usually isn’t created in one dramatic cooking disaster.
It builds gradually.
A little splatter behind the stove. Fingerprints on a cabinet. A sticky range-hood filter. Grease around the knobs. A few drops beside the cooktop.
Individually, none of these seems like a big deal. Together, they can make an otherwise clean kitchen feel permanently grimy.
The solution doesn’t have to be complicated.
Start with warm soapy water, give stubborn grease time to soften, clean each surface appropriately, and deal with small splatters before they become big jobs.
You don’t need your kitchen to sparkle like a showroom.
You just want to be able to touch the cabinet beside the stove without immediately wondering why your fingers are sticky.
And that’s a cleaning standard I think we can all get behind.