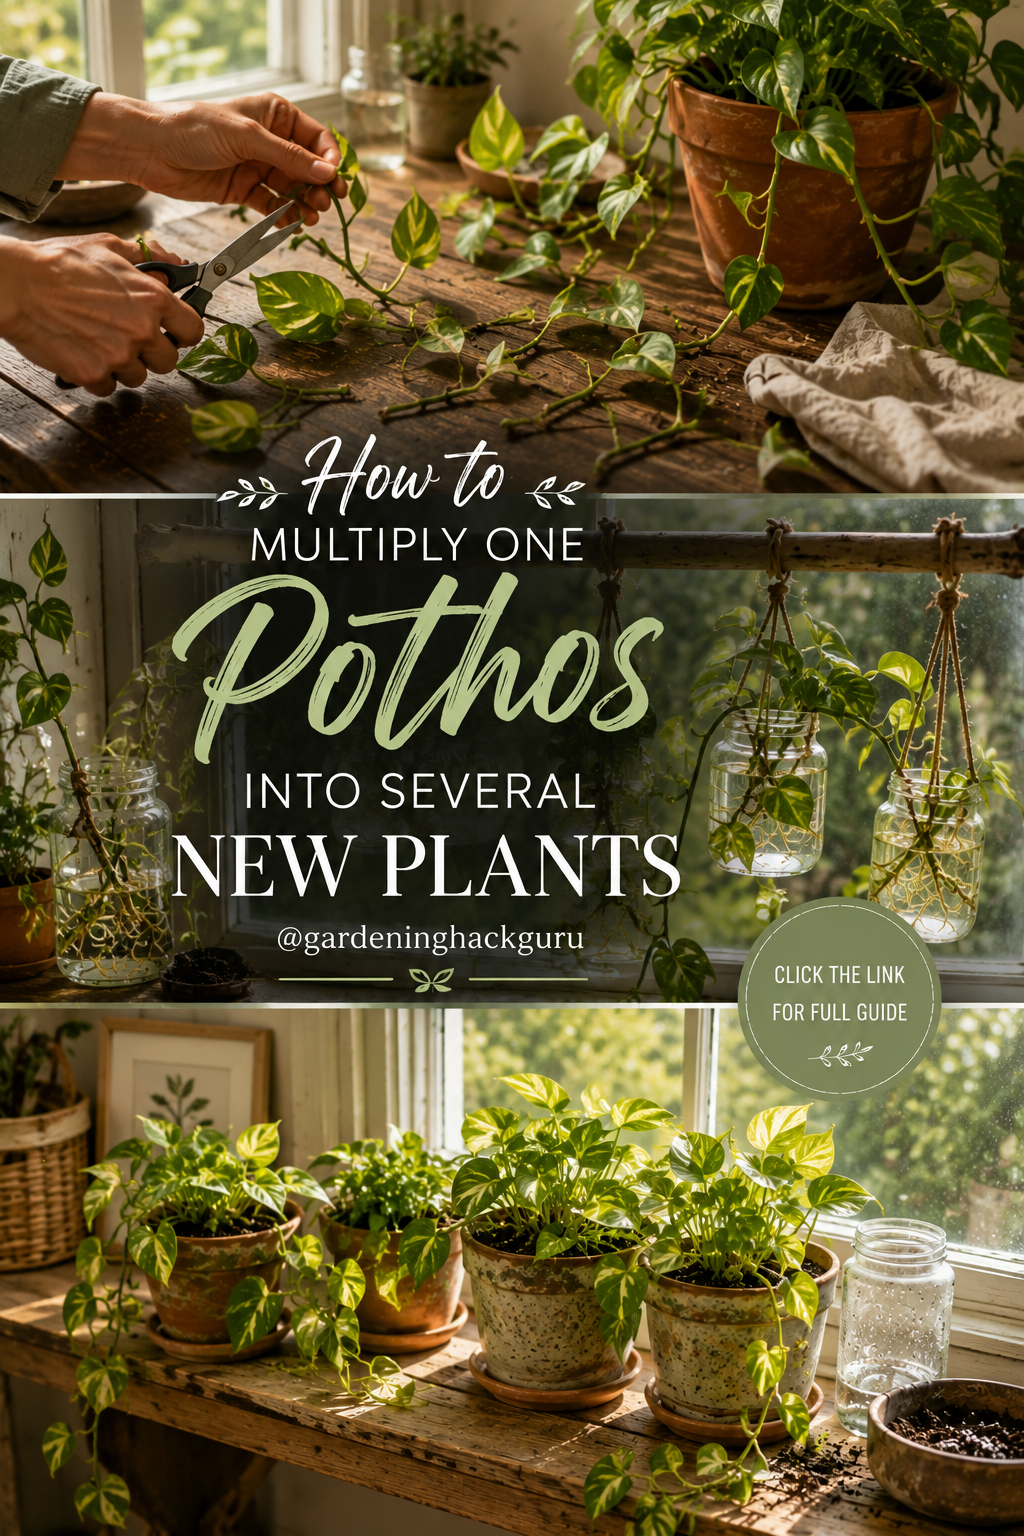
If you already have one healthy pothos, you may not need to buy another one. A single established vine can provide multiple cuttings, and each properly prepared cutting can potentially become a new plant.
Pothos (Epipremnum aureum) is popular with beginner houseplant growers partly because it is relatively easy to propagate. The key is understanding one tiny part of the plant: the node.
With a healthy vine, clean scissors, water, and a little patience, you can turn one long pothos stem into several rooted cuttings. You can then plant them separately for multiple new plants or combine several in one pot for a fuller appearance.
Here’s how to do it.
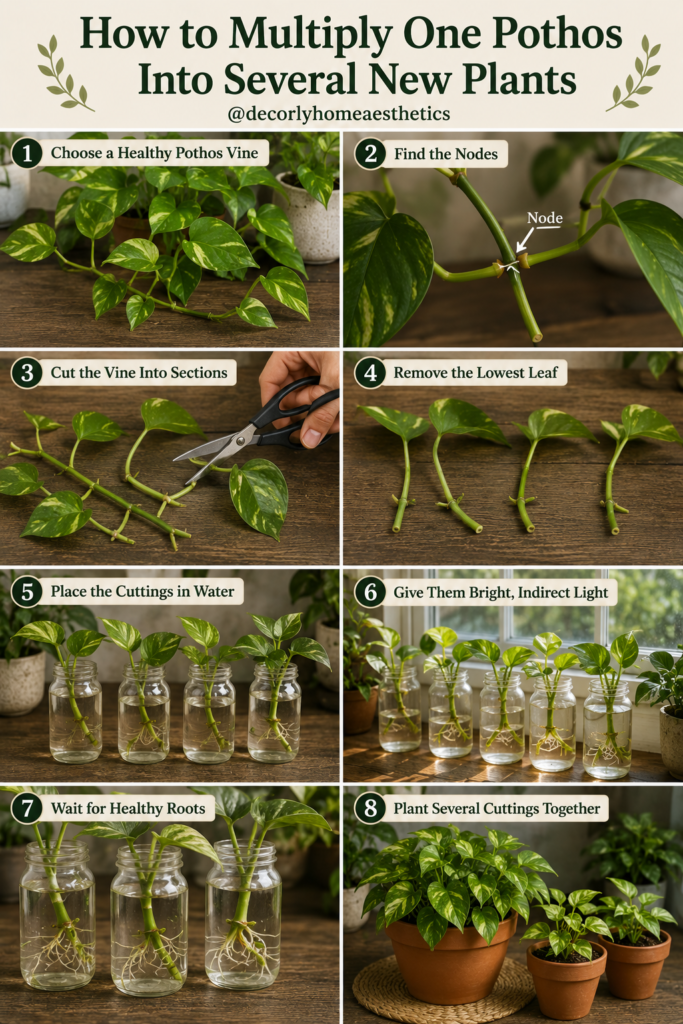
1. Choose a Healthy Pothos Vine
Start with a vigorous mother plant.
Look for a vine with healthy leaves, firm stems, and several visible nodes. Avoid propagating from sections that are yellowing, mushy, badly damaged, or showing signs of pests or disease.
A longer vine with many nodes is particularly useful because you can divide it into multiple cuttings.
You don’t need enormous leaves or an unusually mature plant. A normal healthy household pothos works perfectly well.
2. Find the Nodes
This is the most important step.
A node is the point along the stem where a leaf attaches. You may also notice a small brown bump or aerial-root nub near it.
New roots and shoots develop from nodes.
If you put a beautiful pothos leaf in water without including a node, it may stay green for a while, but it won’t develop into a complete new pothos plant.
Before making any cuts, follow the vine with your fingers and identify each node.
Easy rule:
Leaf + stem + node = potential new plant.
3. Cut the Vine Into Sections
Use clean, sharp scissors or pruning shears.
Make your cuts so that every propagation section contains at least one healthy node. A cutting with one or two leaves is usually easy to manage.
Cut slightly below the node you intend to root.
If you have one long vine containing six or seven suitable nodes, you may be able to create several individual cuttings from that single stem.
That’s where pothos propagation becomes so satisfying.
One vine can potentially become many plants.
4. Remove Leaves That Would Sit Underwater
Before placing your cuttings into water, check the lowest node.
You want the node underwater but the foliage above water.
If a leaf would be completely submerged, remove that lower leaf carefully while keeping the node intact.
Leaves sitting underwater for long periods can deteriorate and contribute to poor water quality.
There’s no need to remove all the leaves. The cutting still benefits from retaining healthy foliage.
5. Place the Cuttings in Clean Water
Fill a clean glass, jar, or propagation vessel with water and insert your pothos cuttings.
Make sure at least one node on each cutting is submerged.
The leaves should remain above the waterline.
Clear glass containers are especially fun because you can watch the roots develop.
You can place several compatible cuttings in one jar as long as they’re not packed so tightly that stems become difficult to remove later.
A simple glass jar works just as well as an expensive propagation station.
6. Give Them Bright, Indirect Light
Place your propagation jar somewhere that receives plenty of bright, indirect light.
A spot near a bright window can work beautifully.
Avoid leaving tender cuttings in intense, hot sunlight that significantly heats the water or scorches the foliage.
At the other extreme, don’t put the jar in a dark corner and expect rapid, strong growth.
Adequate light helps the cutting maintain its leaves while developing roots.
7. Keep the Water Fresh
Propagation water doesn’t need complicated additives.
The most important thing is keeping the environment reasonably clean.
Check your jars regularly and replace or refresh the water when it becomes cloudy, dirty, or noticeably depleted.
Top it up when evaporation causes the water level to drop below the nodes.
If algae or residue builds up heavily on the container, gently clean the jar before replacing the cutting.
You don’t need to change perfectly clean water every day.
💧 When Will Pothos Roots Appear?
Pothos can begin developing visible roots relatively quickly under favorable conditions, although exact timing varies with temperature, light, plant health, and the cutting itself.
Initially, you may notice a tiny pale root emerging from the node.
Then it lengthens.
Eventually, additional roots and smaller side roots may develop.
Don’t worry if every cutting doesn’t progress at exactly the same speed. Even cuttings taken from the same vine can root differently.
8. Wait Until the Roots Are Established
Seeing the first tiny root is exciting, but you don’t have to rush the cutting into soil immediately.
Allow the root system to become reasonably established first.
Rather than obsessing over one exact root length, look for multiple healthy roots with some development and branching.
The cutting should appear healthy, hydrated, and stable.
Once the root system is established enough to handle transplanting, you can move on to soil.
9. Prepare the New Pots
Choose small containers with drainage holes.
Fill them with a suitable, well-draining houseplant potting mix.
Avoid putting a tiny cutting into an enormous container filled with wet soil. A pot appropriately sized for the young root system is easier to manage.
Lightly moisten the potting mix before or immediately after planting.
The goal is moist soil—not mud.
10. Plant the Rooted Cuttings
Create a small hole in the potting mix and gently place the rooted portion of the cutting inside.
Handle water-grown roots carefully because they can be relatively delicate.
Cover the roots and node with potting mix while keeping the leaves above the soil.
Press the soil lightly around the stem to hold the cutting upright.
Then water thoroughly and allow excess water to drain.
🌱 One Vine, Two Different Results
At this point, you have an important choice.
Option 1: Make Several New Plants
Plant each rooted cutting in its own small pot.
If you successfully rooted six cuttings, you can potentially start several individual pothos plants.
This is perfect for filling different rooms or giving propagated plants to friends.
Option 2: Make One Fuller Pothos
Instead of planting each cutting separately, place several rooted cuttings around the same pot.
This creates more growing points and gives the pot a fuller appearance much faster than relying on one single vine.
If your existing pothos looks sparse, this is one of the most useful tricks.
🌿 How to Make the New Pothos Look Bushier
Pothos naturally grows as a vine. It doesn’t necessarily form a dense shrub on its own.
That’s why a very full-looking pothos pot often contains multiple vines or cuttings.
To create that appearance:
Plant several rooted cuttings around the pot rather than putting all of them in exactly the same spot.
Distribute them around the center and edges.
As the individual vines begin growing, the container will look much fuller.
You can also propagate future long vines and return those rooted cuttings to the original pot.
Over time, a sparse plant can become dramatically denser.
✂️ What Happens to the Original Pothos?
Don’t worry about the mother plant.
When you prune a healthy pothos vine, growth can continue from nodes remaining on the original plant.
Pruning excessively isn’t helpful, but thoughtful trimming can encourage the plant to redirect growth.
Continue providing the mother plant with appropriate light, water, and nutrition after taking cuttings.
You may eventually have both:
Your original pothos + several new pothos plants.
🪴 Can Pothos Live in Water Permanently?
Pothos can grow in water for extended periods, which is why water-filled pothos jars are popular decorative displays.
However, there’s a difference between rooting a cutting in water and maintaining a plant hydroponically for the long term.
If your goal is simply propagation, plain water is useful while roots develop, followed by transplantation into potting mix.
Long-term water culture requires more attention to nutrition and water quality because plain water alone doesn’t provide everything a growing plant needs indefinitely.
For beginners who want traditional houseplants, transitioning established cuttings into potting mix is straightforward.
🌤️ Caring for Your New Pothos Plants
Once your cuttings are planted, treat them like young plants rather than mature specimens.
Give them bright, indirect light.
Keep the potting mix appropriately moist while they’re adjusting, but don’t leave it permanently saturated.
As the plants become established, allow the upper portion of the potting mix to begin drying between waterings rather than following a rigid calendar.
Always use containers with drainage holes.
🚫 Common Pothos Propagation Mistakes
Cutting Without a Node
This is the biggest mistake.
A leaf by itself isn’t enough. Make sure every cutting contains a node.
Submerging the Leaves
Keep leaves above the water while nodes remain submerged.
Using Unhealthy Vines
Strong mother plants generally provide better propagation material.
Putting Cuttings in Harsh Sun
Bright light is helpful; scorching sunlight through glass isn’t.
Letting the Water Become Dirty
Cloudy, foul-smelling water should be replaced.
Planting Too Deeply
Roots and nodes belong in the potting mix, but don’t bury healthy foliage.
Overwatering After Transplanting
Newly planted cuttings need moisture, but constantly waterlogged soil can cause problems.
💚 How to Create a Hanging Pothos Propagation Display
The hanging glass-jar look is particularly beautiful if you want propagation to double as home décor.
Attach several secure glass propagation containers to a properly anchored wooden rail or other sturdy support.
Place one or more pothos cuttings in each jar and allow the vines to trail naturally.
Keep the jars near suitable natural light and make sure they’re firmly secured—water-filled glass is surprisingly heavy.
Over time, you’ll be able to see pale roots developing through the clear glass while green vines cascade below.
It creates a living propagation wall rather than hiding your cuttings on a forgotten windowsill.
🎁 Propagated Pothos Makes a Great Gift
Once your cuttings are rooted and established in soil, they make inexpensive and meaningful gifts.
Use a simple terracotta pot, ceramic planter, or recycled container with appropriate drainage.
You could even attach a small care card explaining:
Bright indirect light • Water when needed • Don’t let the roots sit in water
A plant grown from your own pothos feels much more personal than buying another one from the store.
🌿 Final Thoughts
Multiplying pothos is surprisingly simple once you understand the node.
Start with one healthy vine, identify its nodes, and divide it into several cuttings. Keep at least one node on every cutting, place those nodes in water, and provide bright indirect light while roots develop.
Once the roots are established, plant your cuttings in potting mix.
Put them into separate containers and you’ll have several new pothos plants.
Or combine several cuttings in one pot and you’ll create a fuller, bushier-looking pothos.
Either way, one long vine that might normally have been trimmed and discarded can become the beginning of an entire collection.